Monday, May 31, 2010

Marbling on other blogs

Thanks for all the comments on my last few marbling posts! There are two other bloggers who I know have used this technique, and you should like to check out their posts as their results illustrate (once again) how versatile this is.

Colette has a pretty spiral floral-looking one in two pink hues (and a video tutorial) here

rmcandlelight has a fabulous swirly yellow and purple combination here.

And because I love pictures, I'm leaving you with one I posted previously - my initial play time with this technique.
From ANOTHER Bottle of Polish?!

Sunday, May 30, 2010

Marbling - step by step

Disclaimer - I'm not an artist and just taught myself how to do this, so I'm still a long way from getting this technique to look "pretty".

After receiving two requests for more info on how to do this. I decided to show the process I followed in pictures. Here is the end result...

1. Gather supplies: My desired colors (I used all Sally Hansen - Denim Creme, Pacific Blue, and White Tip), a brush with thin bristles, a bit of acetone to clean my brush when needed, and a napkin for the same purpose.

2.Paint your first coat of the desired color (on all nails).

3. Paint a second coat (on one nail at a time).

4. Quickly, while polish is still wet, add a line or shape in your second color. Apply this step and the next like you put on topcoat when trying to prevent smearing of colors - gently roll a drop on without actually touching your polish brush to the nail.

5. Add your next color over the second, or to the side, or intersecting - depending on what you want.

6. Use the brush to gently feather out the wet polish from the middle. Clean brush as needed.

7. This step is optional. I did this because I realized I added more white than I wanted to. Using the brush, zigzag or swirl down the middle of your pattern to mix the colors a little more.
8. Now move on to the next nail and repeat steps 3 (adding second coat) through 6 or 7 on the rest of your nails. Finish off with a quick dry topcoat (you'll need it bc this can get pretty thick), applying it thickly and gently to avoid streaking.

This is such a versatile way to add color to your mani:
- You may or may not need the first coat of color - depending on how light you are with the brush while feathering.
- You can use just two colors if you prefer (i.e. use the base color again instead of the white in the middle).
- You can do just tips, blobs/dots of color instead of lines - anything! Feather from the inside out, outside in, or in swirls.
- Use a shimmer as one of your colors to add some bling.
- Work on patterns that could resemble flowers or water marble patterns, or FRACTALS!

Have fun!
I hope this helps those who wanted the info. (I do have to say, having some nail tips handy helped as I wouldn't have had the patience to try this out on my nails. Being able to play with tips means my mani is not affected and I don't have to worry about taking the polish off when I'm done playing.)

Covergirl and Sally Hansen - marbling (pic heavy)

Colors used: CoverGirl - Fuschia Fatale and Plum Pudding, Sally Hansen - White Tip
Application
: Smooth on the base coat of Fuschia Fatale - almost a one-coater.
Coats: 2 of Fuschia Fatale, One partial each of the other two
Source: Drugstore clearance (Walgreens, Rite Aid) and Dollar Tree
Comments: I mentioned in my last post that I was bored and messed around with creating marble-like manis without using water. I decided to try this out as an actual mani. I like the results - though it takes getting used to. I find it kind of ugly, but I'm smitten when I look at my nails close up. This is a fun technique that can be used in so many different ways.
I switched it up on my right hand (last two pics below) and started with blobs rather than lines. I think I prefer that look. A quick play by play will be in my next post.


Fuschia Fatale, Plum Pudding, White Tip


Right Hand below... (pre-cleanup)


Saturday, May 29, 2010

Non-water marbling

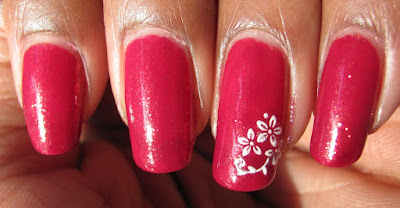
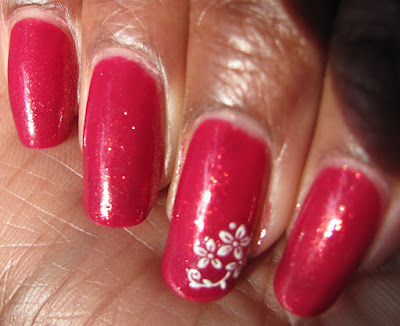
I'm not ready to get rid of my sparkly red nails yet (and I NEVER wear red, so this is unusual for me!). However, I wanted to play with my polish. I decided to try out marbling on some tips. I like the results, though I think I got a little too excited with the process and overdid it. Here are my results.


Sally Hansen Ruby Slipper - pic heavy

Application: Smooth
Coats: 2
Source: Kmart
Comments: This is a gorgeous red with what looks like gold, red and orange micro flakies. I tried SO hard to capture just how beautiful this polish is, and unfortunately, it looks the most awesome in low lighting, so the camera couldn't get it properly. I started my mani with an accent finger featuring Rimmel - Sunny Side which is more pink/peach colored than shown. Since that turned out looking hideous, I covered it up later. I FINALLY got some sunlight for the last four pictures.


Friday, May 28, 2010

Mini-haul - including my first Kleancolor polishes

I was in downtown LA with my mother in law this afternoon, and although I didn't get a chance to stop in the beauty supply store, I ran into a guy selling some KleanColor nail polish in the Santee Alley area. I grabbed just three colors - shown on the right below. I also dropped in at a Target later in the day and picked up some "hubby-friendly" colors.
Bottles - left to right: Sally Hansen Toffee, Lilac, Truffle; Kleancolor Cappuchino(yes, it's spelled like that), Dark Brown, Neon Aqua
This is the first time I've seen Kleancolor.

Tuesday, May 25, 2010

Sation - 18K Gold and Sally Hansen - Dazzling

Application: Smooth.
Coats: 2 of 18K Gold, followed by 1 of Dazzling
Source: Either VictoriaNailSupply or TransDesign for the 18K Gold. Dazzling is an oldie from my stash.
Comments: BRING ON THE BLING! (it's about time too, right?) I love the old Sally Hansen glitters. They're small, dense and easy to apply. My favorite way to apply glitters is like I've done for this mani - first a similar base color, then one coat of the glitter. Easy application, easy removal. I'm loving having some bling on my nails after such a long time!


Sunday, May 23, 2010

Sally Hansen - Strong Blush

Application: Smooth
Coats: 2
Source: Dollar Tree
Comments: This looked so promising in the bottle because it has tons of gold/silver shimmer in it. I was disappointed though. The shimmer didn't add as much life to the polish as I would have liked - even with Seche Vite topcoat. I don't mind the visible nail line at all. I'm actually only wearing pink this time because my husband requested it.


Thumbnail rescue - Used Orly Nail repair. A little lumpy because I didn't buff the surface down well.

Friday, May 21, 2010

A break! Gah!

Someone in my vanpool asked me today how I keep my nails so long and such. I think she jinxed me! I was making up the bed in the guest room for my hubby's bro and his wife, banged my thumbnail against the wall, and got this. Sigh... Ah well, now it'll match my other thumb - which continuously splits vertically down the middle. Ugh.