APPLICATION: Smooth
COATS: 1
TOPCOAT?: Yes
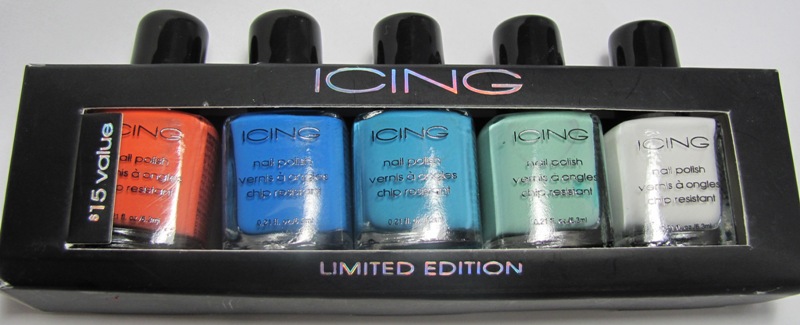
SOURCE: American Apparel store, Walmart, and Michael's Crafts respectively
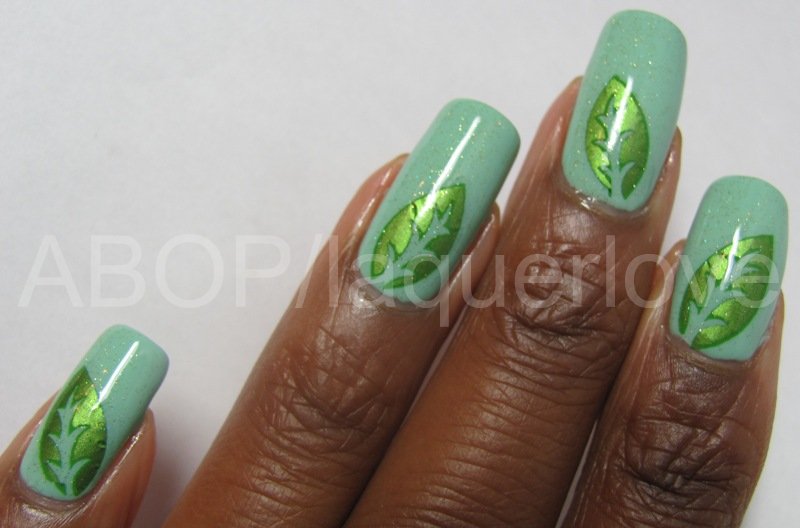
COMMENTS: I have quite a large number of rub-on decals and tattoos in my stash, so I decided to use some. The mani started with Office - I wanted a one-coater so I wouldn't have to wait too long after my topcoat to use the rub-ons. I noticed the glitter on the rub-ons I was planning to use, and decided to sponge on a little extra sparkle using Pure Ice - Busted. Then came topcoat, the decals, and another coat of topcoat. These decals came with a bit of adhesive on them so I had a harder time getting them to release from the plastic and adhere to my nail. Fun results though!
Randomly sponged on Pure Ice - Busted:
The rub-ons I used:
Right Hand:
Action shots - with my coffee mug :
And with the Biotin pills that I'm NOT taking anymore:
Showing posts sorted by relevance for query rub ons. Sort by date Show all posts
Sunday, April 10, 2011
Monday, January 17, 2011
Icing - Unnamed coral mini
APPLICATION: Smooth
COATS: 2
TOPCOAT?: Before adding rub-ons - No, after adding rub-ons - yes, 1 coat of CND Air Dry
SOURCE: Icing store in the mall, part of a set of five minis.
COMMENTS: I ended up wearing the green with leaves until Sunday evening! As lovely as this next coral color is, I was surprised at how neon it looked on my nails. It was bright! My nails actually looked like plastic, so to tone it down I added some random rub-ons. Kinda blah, this looked better as a solid color but it was good enough for one day.
UP NEXT: The darker blue from the same set (finally!) - bottle no. 2 below:
Wednesday, January 12, 2011
Icing - Unnamed mint green mini
APPLICATION: Annoying! Thick and slightly streaky. 2nd coat was better, but not much. Worth it for the color though!
COATS: 2
TOPCOAT?: See photo comments
SOURCE: Icing store in the mall - part of a five-pack of minis. Decals were purchased at Joann fabric & crafts store.
COMMENTS: This color is unique to my collection - yaay! It's gorgeous and shiny and was the perfect base for another go at using rub-on decals. I've been wanting to use more of these since my first mani with rub-ons. These wrinkled a bit, but I'm very happy with the final result!
Base coat + two coats of the green - so shiny on its own:
After cleanup and one coat of Beauty Secrets Fast Finish:
The rub-ons I used. I've placed my fingers right next to the section with the leaves used:
Right after applying the rub-on decals:
Finally, applied a coat of China Glaze - Golden Enchantment for sparkle, and covered with another layer of my fast dry topcoat:
UP NEXT: Either the darker blue or the coral from the same pack:
Labels:
abop's favorites,
decals,
green,
icing,
nail art
Sunday, September 8, 2013
L'Oreal - Lilac Cooler, Creme De Mint, and rub-ons
APPLICATION | APLICACIÓN:
Smooth ** Suave
COATS | CAPAS:
2
TOPCOAT? |CAPA FINAL?:
See photos ** Mira las photos
SOURCE | ORIGEN:
L'Oreal: Walgreens
Rub-ons: Dollar Tree
COMMENTS | COMENTARIOS:
It's been a while since I've used rub-on decals - and my application skills are not very good anymore!
** Ha pasado un tiempo desde que he usado etiquetas "rub-on" - y mis habilidades de aplicación ya no son muy bueno!
No topcoat:
With topcoat:
Thursday, April 14, 2011
Jessica - Victorian Crush
APPLICATION: Smooth, though I did have to thin the polish between the first and second coats.
COATS: 2
TOPCOAT?: In some photos - see photos for details.
SOURCE: Nail supply store in LA - I think it was $3.50
COMMENTS: I've loved this color since I first saw it. When rmcandlelight wore it in this post on her blog I knew I had to get it and finally did late last year. It reminds me of Kleancolor - Fashionista, but my countertop is a mess, so I haven't been able to pull that one out to compare it to Victorian Crush.
Both rub-ons and temporary tattoos were used on this manicure (Look Jenni, no florals!).
Final look - with topcoat:
2 coats of Jessica - Victorian Crush, no topcoat:
Rub-ons and temporary tattoos - I used the small dots on the left and cut the star-like ones on the right in half:
After applying them - tattoos with water on the backing, dots rubbed on, no topcoat:
After topcoat:
Tuesday, November 16, 2010
Fingerpaints - Paper Mache (and fun from the craft store)
APPLICATION: A little thick, but smooth
COATS: 2
TOPCOAT?: Yes, Beauty Secrets Fast Dry
SOURCE: Sally Beauty Supply
COMMENTS: I certainly didn't plan to do a plain white mani - that would have been too stark. I've seen a few other bloggers do "newsprint" manis, and like the look of the print on the nails. I have no newsprint, so came up with my own version using rub-ons from the craft store (normally used for scrapbooking). I applied the quick dry topcoat after Paper mache, and when dry enough, rubbed the words/portions of words on, then some images. Followed the rub-ons with a coat of INM Northern Lights - silver for a bit of sparkle, and finally a layer of topcoat. I love it! So simple but so awesome!
UP NEXT: Something black
Labels:
decals,
fingerpaints,
nail art,
sparkle,
white
Monday, November 22, 2010
Rub-on transfers are not all created equal
COMMENTS: When I used a new set of rub-ons on my Nyx - Perfect Grey mani the next day, I realized that I'd picked a batch that didn't work well for nail art. These were thicker - more like stickers. They also had some sort of glue on them - not alot, but enough to make the rub-on process less fun. Here is the finished product. I had to use two coats of topcoat because of the thickness of these.
This is the pack they came from. These are all pretty, but too thick. Purchased at Joanne Fabric & Crafts:
And here is the pack that contributed the little green butterflies and flowers (bottom left) to my first rub-on mani. Nice and thin and tranfered easily and completely - a pleasure to work with. Also purchased at Joanne :
And the pack below contributed the days, months, and little green heart. Nice and thin and easy to work with as well. Purchased at Big Lots:
So, I learned a lesson. I need to really try to gage the thickness of the rub-on transfers before purchasing - especially since I don't do any scrapbooking or card making!
UP NEXT: Something blingy
Tuesday, September 25, 2012
Rub on transfers/decals over Fingerpaints - Paper Mache
APPLICATION | APLICACIÓN:
Smooth ** Suave
COATS | CAPAS:
2
TOPCOAT? |CAPA FINAL?:
Yes ** Si
SOURCE | ORIGEN:
Fingerpaints: Sally Beauty Supply
Rub-Ons: emmaspaperie.com
COMMENTS | COMENTARIOS:
These decals were not the easiest to rub on, but they're cute. I later made the manicure matte and then added more color with my gel pens.
** Estas calcomanías no son los más fáciles de frotar, pero son lindos. Lo que más tarde hizo la manicura en mate y luego añadió más color con mis lápices gel.
Subscribe to:
Posts (Atom)


